
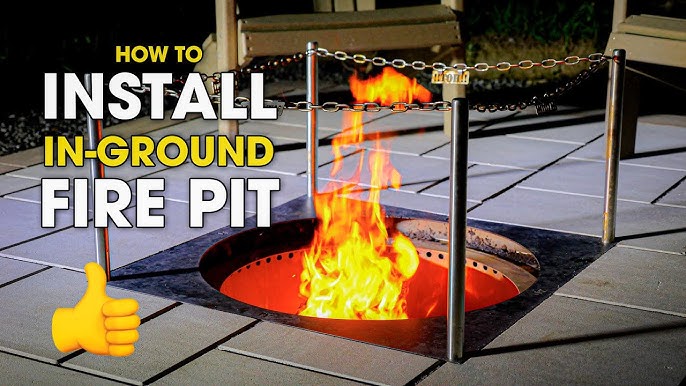
Smokeless fire pits are one of the few outdoor products where the marketing name oversells something that genuinely works. They are not smokeless, and anyone who tells you otherwise has not lit one with damp wood. What they do is burn far cleaner than an open fire, through a mechanism that is simple enough to build yourself if you understand what it is doing.
A smokeless fire pit works by secondary combustion. An inner and outer wall create a gap that draws cool air in at the bottom, where the fire heats it as it rises between the walls, and that preheated air is injected back into the fire through a ring of holes near the top. Smoke is unburned fuel, so burning it a second time at high temperature converts most of it into heat and light instead. The result is a hotter, cleaner fire with much less smoke, provided you feed it dry, seasoned wood.
In short: a double wall preheats air and injects it above the flames, burning the smoke instead of releasing it.
There is a genuine safety dimension that smokeless designs partly address. Wood smoke contains fine particulate matter that health agencies link to respiratory irritation, which is why sitting in the smoke stream is worth avoiding regardless of what you are burning it in.
Below: how secondary combustion actually works, the two ways to build one yourself, why wood moisture matters more than the design, how a DIY version compares with a manufactured one, and the maintenance that keeps it burning clean.
Key Takeaways
- Smoke is unburned fuel. A smokeless pit burns it a second time rather than preventing it.
- The double wall preheats incoming air, which is what makes secondary combustion possible.
- Air enters at the base, rises through the gap, and is injected through holes near the top rim.
- Dry seasoned wood matters more than any geometry. Wet wood smokes in any design.
- They are not genuinely smokeless, particularly when starting up or burning down.
- A DIY version from steel drums or buckets works, but welding and safe materials matter.
- Never use galvanised steel, because heated zinc coating releases toxic fumes.
Smokeless Pits and the Parts to Build One
You can buy the principle ready-made or build it yourself. The manufactured units below show the design executed properly, and the fire pit components cover the DIY route and the containment that any fire area needs.
If you are building your own, source plain steel rather than galvanised, and plan the air hole pattern before cutting anything. Those two decisions determine whether it works and whether it is safe.


What Smoke Actually Is
Smoke is not a byproduct in the sense of waste that had to be produced. It is fuel that failed to burn. When wood is heated it releases flammable gases and fine particles, and when those escape the fire without combusting, you see them as smoke and smell them on your clothes for days.
Incomplete combustion happens for two reasons: not enough oxygen reaching the gases, and not enough temperature where they are. An open campfire has plenty of oxygen around it but the gases rising from the fuel pass straight up through air that is too cool and too poorly mixed to ignite them.
That is the opportunity a smokeless design exploits. If you can deliver hot air directly into the rising gases at the right height, those gases burn. The visible result is a fire with a cleaner flame, noticeably more heat for the same wood, and far less smoke drifting into whoever is sitting downwind.
How Secondary Combustion Works
The mechanism depends on a double wall with a gap between the inner and outer vessel. Holes at the base of the outer wall let cool air enter that gap. As the fire burns, the inner wall gets extremely hot, and the air in the gap is heated as it rises, which also makes it rise faster through natural convection.
By the time that air reaches the top of the gap it is both hot and moving. A ring of holes around the inner wall near the rim directs it inward, straight into the column of unburned gases coming off the fire. Hot air plus unburned fuel plus adequate temperature equals combustion.
You can see it working. A properly functioning smokeless pit produces a distinctive ring of secondary flames dancing above the main fire, at the level of the upper holes. When that ring establishes, the smoke largely disappears; when the fire dies down below the temperature it needs, the smoke returns.
| Air supply | Where it enters | What it feeds | If it is blocked |
|---|---|---|---|
| Primary air | Through holes in the base floor | The burning wood itself | Fire struggles, burns slowly and smokes |
| Secondary air | Ring of holes near the top rim | Unburned gases above the fire | No secondary combustion, so smoke escapes |
| The wall gap | Base of the outer wall, rising upward | Preheating the secondary air | Air arrives too cool to ignite the gases |
| Ash build-up | Blocks the base floor holes | Nothing; it chokes primary air | Smoky, sluggish fire; empty it regularly |
Building One Yourself
The DIY route uses two steel vessels of different diameters, most commonly a pair of steel drums, buckets or planters. The engineering is not complicated, but the material choice and the hole pattern are where builds succeed or fail.
Material first, because it is a safety issue rather than a performance one. Use plain steel or stainless steel. Never use galvanised steel, because the zinc coating vaporises when heated and produces fumes that cause metal fume fever. If you cannot confirm a drum is not galvanised, do not use it.
- Source two plain steel containers. You need an outer and an inner vessel with a gap between them, such as two steel drums or buckets of different diameters. Use plain or stainless steel, never galvanised.
- Plan the air gap. Aim for roughly an inch of space between the walls all the way round. Too little restricts airflow, too much and the air does not preheat enough.
- Drill the lower intake holes. Put a ring of holes around the base of the outer wall, so cool air can enter the gap. These feed the entire system.
- Drill the secondary combustion holes. Drill a ring of holes around the inner wall near the top, angled slightly inward. This is where preheated air is injected back into the fire.
- Add a base floor with air holes. Perforate the floor of the inner vessel so air reaches the fire from below. This is the primary combustion air, separate from the secondary ring.
- Join and seal the top rim. Close the gap at the top edge apart from the secondary holes, so air is forced through them rather than escaping around the rim.
- Raise it off the ground. Set the pit on legs or blocks so the lower intake holes are not blocked and the heat is not transmitted into the ground underneath.
- Test burn in a safe location. Burn it first on bare ground well away from anything flammable. Check that air is drawing through, watch for hot spots, and confirm nothing warps badly.
The In-Ground Alternative
There is a simpler approach that predates the manufactured versions by a long way, usually called a Dakota fire hole. It uses two connected holes in the ground: a main chamber for the fire and a narrower angled shaft that feeds air in from the side at the base.
The mechanism is related but not identical. The side shaft delivers a strong draught of air directly into the base of the fire, which makes it burn hotter and more completely than an open fire with the same wood. It reduces smoke considerably without achieving true secondary combustion.
The advantages are that it costs nothing, uses no materials and is almost invisible, which is why it appears in bushcraft contexts. The disadvantages are that it requires digging, which is prohibited at many managed sites and conflicts with Leave No Trace in most settings, and it scars the ground.
DIY Versus Buying One
The honest comparison is that manufactured units work better and cost more, and the gap is mostly in materials and precision. Stainless steel resists warping and corrosion in a way that mild steel drums do not, and the hole patterns on commercial designs are the result of testing rather than guesswork.
| Factor | DIY build | Manufactured unit |
|---|---|---|
| Cost | Low if you have materials and tools | Significant, especially for stainless |
| Smoke reduction | Good, with the right hole pattern | Better, and more consistent |
| Durability | Mild steel warps and rusts over seasons | Stainless resists both far longer |
| Portability | Usually heavy and awkward | Many are designed to be carried |
| Skills needed | Drilling, cutting, often welding | None beyond lifting it out of the box |
| Satisfaction | Considerable, if it works | Less, but it works on the first night |
The other practical consideration is heat underneath. These pits run hot at the base, and both DIY and manufactured versions will scorch a lawn or damage a wooden deck if placed directly on them. Legs, a stand, or a layer of paving slabs are part of the setup rather than an optional extra.
If you want a permanent fire area in stone instead, we cover that separately in how to build a stone fire pit.
Getting the Cleanest Burn
The design does half the work and the fuel does the other half. Dry, seasoned hardwood burned in a pit that is not choked with ash will produce the ring of secondary flames and very little smoke. Damp wood in the same pit will smoke steadily, because the fire never gets hot enough.
Startup and burn-down are the two phases where smoke is unavoidable, and no design changes that. Until the pit is hot enough to establish secondary combustion, you get an ordinary smoky fire, and as it dies back below that temperature the smoke returns. The clean period is the middle.
Do
- Burn dry seasoned wood, ideally hardwood, split small enough to catch quickly
- Empty ash regularly so the base air holes stay clear
- Let the fire establish properly before judging how it performs
- Raise the pit off grass, decking or anything heat-sensitive
- Store it dry or covered, since rain accelerates corrosion
- Keep normal fire clearances, because a smokeless pit still radiates heat
Don’t
- Do not build or burn in galvanised steel
- Do not use drums that previously held chemicals
- Do not burn damp or green wood and expect it to be smokeless
- Do not let ash build up and block the primary air holes
- Do not place it directly on a lawn or a wooden deck
- Do not dig an in-ground fire where it is prohibited or in dry conditions
Clearances matter just as much with a contained pit: see how campfire heat spreads to nearby wood. And for getting it lit in the first place, lighting a fire without matches.
Honest Limits
The name is marketing. These pits are low-smoke rather than smokeless, and they are at their smokiest exactly when you are standing over them lighting the fire. Anyone expecting zero smoke will be disappointed; anyone expecting a large reduction will not be.
A DIY build will not match a well-made manufactured unit, and that is worth saying plainly. Hole sizing, spacing, gap width and material thickness all affect how well secondary combustion establishes, and getting those right by trial and error takes several attempts.
This article also cannot cover fabrication safely in detail. Cutting and welding steel drums involves genuine hazards including residue ignition, sharp edges and fume exposure, and anyone without the tools and experience is better served buying a unit than improvising with an angle grinder.
Stay Safe Out There
A smokeless pit is still a fire. It radiates heat in every direction, it produces embers, and the outer wall gets hot enough to cause serious burns. Keep the same clearances you would use for an open fire, keep water within reach, and never leave it unattended.
Wood smoke contains fine particulate matter that is linked to respiratory irritation, which is a reason to sit out of the smoke stream rather than in it, and a reason these designs are genuinely useful for people with asthma. Burning cleaner reduces the exposure but does not eliminate it.
Fire restrictions apply to contained pits in many areas just as they do to open fires. The National Park Service publishes guidance updated as conditions change, and local authorities set their own rules on recreational fires and burn bans.
Disclaimer: this article is general information, not construction, fabrication or safety advice. Materials, designs and local rules vary, and you are responsible for anything you build and any fire you light. Check local restrictions, use a qualified professional for welding or fabrication you are not equipped for, and seek medical help for any burn or fume exposure that concerns you.
Frequently Asked Questions
How does a smokeless fire pit work?
Through secondary combustion. A double wall draws cool air in at the base, heats it as it rises in the gap, and injects it back into the fire through holes near the top. That burns the smoke, which is really unburned fuel.
Are smokeless fire pits actually smokeless?
No. They are low-smoke. During startup and burn-down, before and after the pit is hot enough for secondary combustion, they smoke like any other fire. In the middle of a good burn with dry wood, the reduction is dramatic.
Can I build one myself?
Yes, from two plain steel vessels with roughly an inch of gap between them, intake holes at the base of the outer wall, secondary holes near the top of the inner wall, and a perforated floor. Cutting and welding skills help considerably.
Why can I not use galvanised steel?
Because heating the zinc coating vaporises it and produces fumes that cause metal fume fever, with flu-like symptoms. If you cannot confirm a drum is plain or stainless steel rather than galvanised, do not burn in it.
What is a Dakota fire hole?
An in-ground design with a main fire chamber and a narrower angled side shaft feeding air to the base. It burns hotter and cleaner than an open fire, costs nothing, but requires digging, which is prohibited in many places.
Why is my smokeless pit still smoking?
Most often damp wood, which uses energy boiling off water instead of reaching combustion temperature. The other common cause is ash blocking the base air holes. Both stop secondary combustion from establishing.
What wood should I burn?
Dry seasoned hardwood, split small enough to catch quickly. Moisture content matters more than species, and wood that has been properly seasoned for a year or more outperforms anything bought damp or cut recently.
Can I put one on my deck or lawn?
Not directly. The base runs hot enough to scorch grass and damage decking. Use legs, a purpose-made stand, or a layer of paving slabs underneath, and keep normal clearances from anything flammable.
Do they produce more heat than a normal fire?
Yes, for the same wood, because the smoke that would otherwise escape is being burned instead. That is the same reason they smoke less. The heat is also directed more upward than an open fire with a wide base.
Are they safe for people with asthma?
They produce considerably less smoke, which helps, but they are not smoke-free and wood smoke still contains fine particulates. Sitting upwind matters regardless, and anyone with significant respiratory problems should take their own precautions.
The Bottom Line
A smokeless fire pit is a double wall doing one clever thing: pulling cool air in at the bottom, heating it on the way up, and injecting it back into the fire above the flames so the smoke burns instead of escaping. Smoke is unburned fuel, so burning it twice gives you more heat, a cleaner flame and far less of that woodsmoke smell in everything you own.
Building one is genuinely achievable with two steel vessels, a drill and some patience, provided you use plain or stainless steel and never galvanised. But the design only does half the job. Dry seasoned wood and clear air holes do the other half, and no geometry rescues a fire fed with damp wood. Treat it as a low-smoke pit rather than a smokeless one, keep the same clearances you would for an open fire, and it will earn its place.