
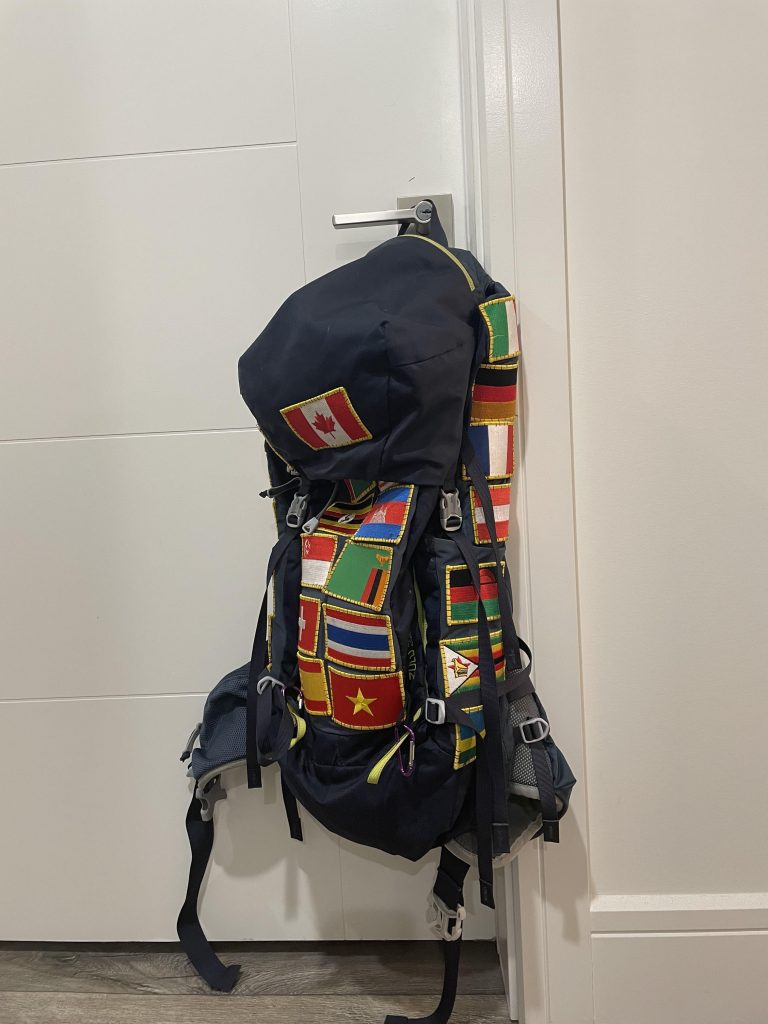
Your hiking backpack is more than just gear—it’s a reflection of your adventures and personality. Adding patches is a simple way to make your backpack stand out and tell your story.
But how do you put patches on your hiking backpack so they stay secure and look great? If you want to customize your gear without damaging it, this guide will walk you through easy and effective steps. Keep reading to discover the best methods that work for any backpack material and get ready to turn your pack into a unique badge of honor.
Choosing The Right Patches
Adding patches to your hiking backpack is a fun way to show your style. Picking the right patches helps keep them looking good and lasting long.
Think about the patch type, what it is made of, and its size. These details make a big difference in how well the patch fits your backpack.
Types Of Patches
Patches come in many styles. Some attach with glue, some sew on, and others use Velcro. Choose the type that suits your backpack and use.
- Iron-on patches stick with heat and are easy to apply.
- Sew-on patches are very strong and good for heavy use.
- Velcro patches let you change or remove them anytime.
- Embroidered patches offer a classic, textured look.
- Rubber or PVC patches are waterproof and durable.
Materials And Durability
Patch materials affect how long they last on your backpack. Choose materials that can handle outdoor conditions.
Look for patches made with strong threads and sturdy backing. Waterproof or weatherproof materials work best for hiking gear.
- Polyester and nylon patches resist tears and water.
- Cotton patches may fade or wear out faster outside.
- Rubber patches can handle rain and mud well.
- Leather patches add style but may need care.
Selecting Size And Design
Pick patch sizes that fit the space on your backpack. Large patches stand out, while small ones add subtle details.
Choose designs that match your hiking style or favorite places. Simple shapes work well on busy backpacks.
- Measure the area before buying patches.
- Use small patches for pockets and straps.
- Choose bold colors for visibility and style.
- Mix designs for a unique look.

Credit: mypacklove.com
Preparing Your Backpack
Putting patches on your hiking backpack can make it look unique. It also helps cover tears or holes.
Before attaching patches, you need to prepare the backpack well. This ensures the patch sticks properly.
Cleaning The Surface
Clean the area where you will place the patch. Dirt and dust can stop the patch from sticking well.
Use a mild soap and water to wash the surface. Let it dry completely before you continue.
Locating The Patch Area
Find the best spot on your backpack for the patch. Choose a flat and smooth area for easy application.
Avoid areas with seams or straps. These spots may cause the patch to peel off quickly.
Gathering Necessary Tools
Get all tools ready before starting. This makes the patching process faster and easier.
- Patch or patches you want to apply
- Cleaning cloth or sponge
- Mild soap and water
- Scissors to trim patches if needed
- Strong adhesive or sewing kit
- Iron, if using iron-on patches
Attaching Sew-on Patches
Sew-on patches add a unique look to your hiking backpack. They show your style and achievements. Attaching them properly keeps them secure on your gear.
This guide explains how to sew patches on. It covers thread and needle choice, stitching tips, and ways to keep the patch in place.
Thread And Needle Selection
Choose a strong thread that matches your patch color. Polyester thread works well for outdoor gear. It resists water and wear.
Pick a needle that fits the thread and fabric. A sharp needle size 9 or 10 is good for thick backpack material. It pierces without damage.
- Use polyester or nylon thread
- Match thread color to the patch
- Select sharp needle size 9 or 10
- Check needle fits your sewing tool
Stitching Techniques
Start by placing the patch where you want it. Pin or tape it lightly to keep it still. Use small, even stitches around the patch edge.
A running stitch or whip stitch works well. Keep stitches close to the patch edge to hold it tight. Avoid large gaps to stop the patch from lifting.
- Use pins or tape to hold patch
- Make small, even stitches
- Stitch close to the patch edge
- Use running or whip stitch
Securing The Patch
Finish stitching by tying a strong knot at the back. Hide the knot under the patch to keep it neat. Cut excess thread close to the knot.
Check the patch for loose spots. Add extra stitches if needed. This keeps your patch safe on rough hikes and long trips.
- Tie a secure knot at stitching end
- Hide knot under the patch
- Trim extra thread carefully
- Inspect and add stitches if loose
Using Iron-on Patches
Iron-on patches are an easy way to customize your hiking backpack. They stick well and add personal style or repair worn spots.
You need to use heat to attach these patches. Careful steps help the patch stay strong during your hikes.
Heat Settings And Safety
Set your iron to the right temperature. Too hot can damage the backpack fabric or patch. Too cool won’t stick the patch well.
Always check the patch label for heat instructions. Use a dry iron without steam to keep heat consistent and safe.
- Use medium heat, about 300°F (150°C)
- Avoid steam to prevent patch peeling
- Test iron on a small fabric area first
- Keep children and pets away during ironing
Positioning The Patch
Place the patch where you want it on the backpack. Make sure the area is clean and dry before starting.
Use pins or tape to hold the patch in place. This stops it from moving while you apply heat.
- Choose a flat surface on the backpack
- Clean the spot with a damp cloth and dry it
- Secure patch edges with tape or pins
- Double-check the patch alignment before ironing
Applying Heat Correctly
Place a thin cloth over the patch to protect it. Press the iron firmly on top for 30 to 45 seconds.
Move the iron gently to cover the whole patch. Let the patch cool before moving the backpack to help it stick well.
- Cover patch with a cloth or parchment paper
- Press iron down firmly and hold for 30-45 seconds
- Iron all patch edges carefully
- Let cool fully before touching or using the backpack
Applying Adhesive Patches
Applying adhesive patches on a hiking backpack is a quick way to add style or cover damage. Adhesive patches stick directly to the fabric without sewing.
Knowing how to apply these patches correctly helps them last longer. Follow simple steps to get the best hold and look.
Types Of Adhesives
There are different adhesives used on patches. Some use glue that sticks when pressed. Others need heat to activate the adhesive.
- Pressure-sensitive adhesives stick when pressed firmly.
- Heat-activated adhesives need an iron or heat press.
- Water-activated adhesives stick after dampening.
- Some patches have sticky backings like stickers.
Surface Preparation
Clean the backpack surface before applying the patch. Dirt and oil stop the adhesive from sticking well.
Use a damp cloth to wipe the area. Let it dry completely before placing the patch.
- Remove dust and dirt.
- Dry the surface fully.
- Choose a flat area with no wrinkles.
Pressing And Setting Time
Press the patch firmly to make it stick. Use strong, even pressure to help the adhesive bond.
Some patches need time to set. Avoid moving or washing the backpack for several hours.
- Apply firm pressure for at least 30 seconds.
- Let patches dry or cool for 24 hours.
- Keep the backpack flat during setting time.
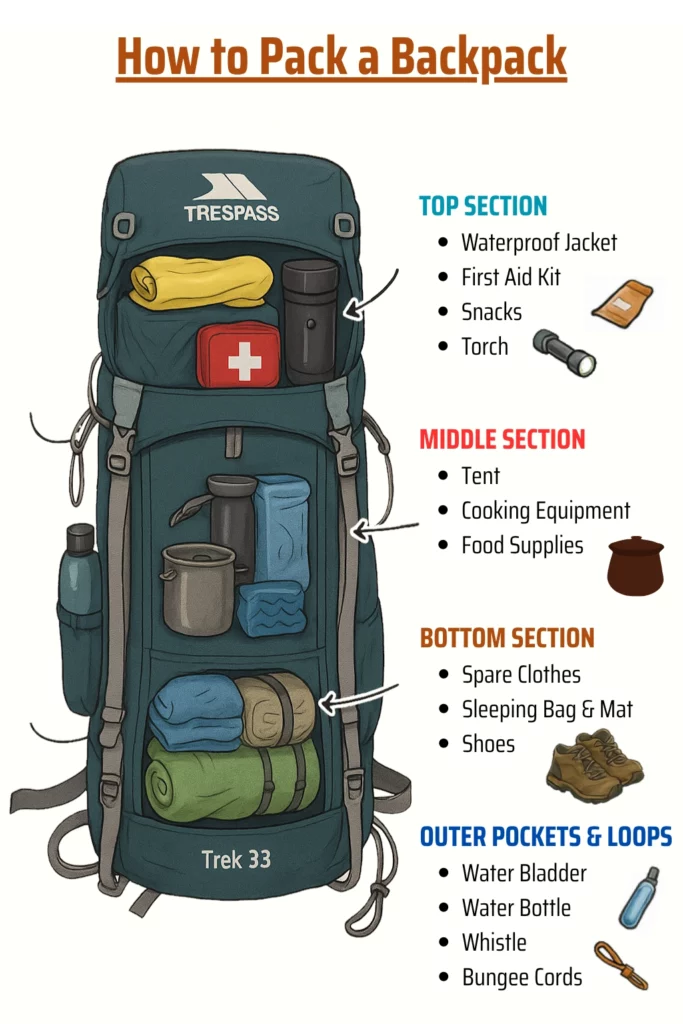
Credit: www.trespass.com
Maintaining Patched Backpacks
Adding patches to a hiking backpack makes it unique and personal. Keeping the patches in good shape helps your backpack last longer. Proper care stops patches from peeling or falling off.
Simple maintenance steps keep your patched backpack looking great. Learn how to clean, fix, and store your backpack to protect the patches.
Cleaning Tips
Clean your backpack gently to avoid damaging patches. Use mild soap and water with a soft cloth or sponge. Avoid scrubbing patches hard.
Do not machine wash or dry the backpack. Let it air dry away from direct sunlight. This protects the glue and fabric of patches.
- Spot clean with mild soap and water
- Use soft cloth or sponge
- Avoid soaking the backpack
- Air dry in shade
- Do not use harsh chemicals
Repairing Loose Patches
Check patches regularly for loose edges. Fix small lifts quickly to stop peeling. Use fabric glue or sew patches back on securely.
For sewing, use strong thread and small stitches. Press patches firmly after repair. This keeps them attached during hiking.
- Inspect patches often
- Apply fabric glue to loose edges
- Sew with strong thread if needed
- Use small, tight stitches
- Press patches after fixing
Storage Suggestions
Store your patched backpack in a dry, cool place. Avoid folding where patches are. Keep it in a way that stops patches from bending or peeling.
Use a hanger or lay the backpack flat. Cover it with a cloth to block dust. Proper storage helps patches stay strong and clean.
- Keep in a dry, cool spot
- Avoid folding on patches
- Hang or lay flat
- Cover to protect from dust
- Check patches before storing
Creative Patch Styling Ideas
Patches add personality to your hiking backpack. They show your interests and adventures.
Here are creative ideas to style patches on your backpack with fun and flair.
Mixing Patch Types
Use different patch styles like embroidered, woven, and PVC patches. This adds texture and depth.
Mixing shapes and materials makes your backpack look unique and eye-catching.
- Combine round, square, and irregular patches
- Use fabric and rubber patches together
- Include patches with different finishes like matte and shiny
Arranging For Visual Impact
Place patches in clusters or rows to create a strong visual pattern. Avoid random spacing.
Balance large and small patches so no area feels crowded or empty.
- Group patches by theme or color
- Start with a large patch as a center point
- Fill spaces with smaller patches around it
Customizing With Colors
Choose patch colors that match or contrast your backpack. This can highlight your favorite patches.
Use bright colors to make patches stand out or muted tones for a subtle look.
- Pick colors from your backpack’s palette
- Use complementary colors for contrast
- Consider patches with multicolor designs
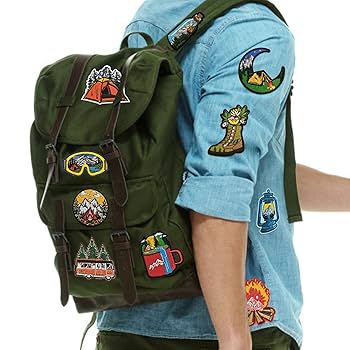
Credit: www.amazon.com
Frequently Asked Questions
How Do You Attach Patches To A Backpack?
To attach patches, use fabric glue, iron-on patches, or sew them on. Clean the area first. Ensure the patch is compatible with your backpack material. Align it properly before securing. For durability, sewing is recommended.
Can Iron-on Patches Damage My Backpack?
Iron-on patches can damage certain backpack materials. Check the manufacturer’s guidelines first. Use low heat settings when ironing. Always test on an inconspicuous area. For delicate fabrics, sewing or fabric glue is safer.
What Type Of Patches Are Best For Hiking Backpacks?
Embroidered and woven patches are durable for hiking backpacks. They withstand outdoor elements well. Ensure patches are waterproof or water-resistant. Choose patches that match your backpack’s material. Consider size and weight for balance.
Are There Specific Tools Needed For Sewing Patches?
Yes, basic tools include a needle, thread, and scissors. Use a thimble for protection. A sewing machine is optional but speeds up the process. Choose thread that matches the patch color. Use strong, durable thread for outdoor gear.
Conclusion
Patching your hiking backpack keeps it strong and ready for trips. Choose the right patch and place it carefully. Use simple tools and follow clear steps to attach patches well. This small fix saves money and adds your style. Keep your gear in good shape for every adventure.
A little effort goes a long way. Now, your backpack looks good and lasts longer. Ready for the next trail?