
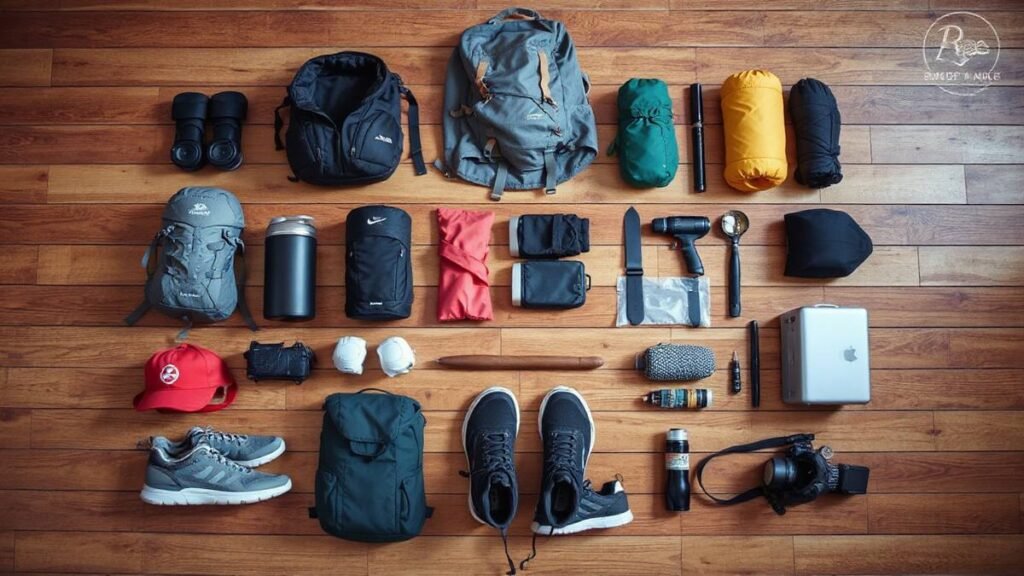
To pack a hiking backpack, put light, bulky items such as your sleeping bag at the bottom, heavy items close to your back and in the middle, and things you need during the day at the top and in outside pockets. A well-packed pack stays balanced, rides close to your body and is far more comfortable over miles. This guide walks through the full process step by step.
Why packing order matters
The way you load a pack changes how it feels more than most people expect. Heavy items placed too low pull your hips backward, while heavy items placed too far from your back make the pack sway and drag on your shoulders. A balanced load keeps your center of gravity over your hips and lets you walk upright with less effort. Good packing also saves time, because you can find your rain jacket or snacks without unpacking everything on the trail.
The basic idea is simple: group your gear by weight and by how often you need it, and then place each group in its best zone. REI Co-op’s guide to loading a backpack uses the same zones.
Step 1: Lay out your gear and cut the extras
Before you pack, lay everything on the floor in groups: shelter, sleep system, clothing, food, kitchen, water, first aid and tools. Look at each group and ask what you really need. Remove duplicates, trim spare clothing and decant liquids into small containers. Every pound you remove makes the pack easier to carry. If your pack still feels heavy, our guide on how to make a hiking backpack lighter has more ideas.
Step 2: Understand the three zones
- Bottom zone. Light, bulky items you do not need until camp, such as a sleeping bag, a sleeping quilt and camp shoes.
- Middle zone, close to your back. Your heaviest items, such as food, a stove, water and a bear canister. Keeping them near your spine puts the weight over your hips.
- Top zone. Items you may need during the day, such as a rain jacket, fleece, snacks, a map and a first aid kit.
Some packs also have a lower compartment with a divider, which you can use for the sleeping bag, and a lid pocket for small items.
Step 3: Pack the bottom
Stuff your sleeping bag into a compression sack or a waterproof liner and push it to the bottom of the pack. Add other bulky items you will not need until camp, such as a sleeping pad if it is stored inside, camp clothes and a pillow. These items cushion the base of the pack and fill the corners, so the heavier items above sit firmly. Avoid putting heavy gear low, because it pulls the pack down and can cause the hip belt to slide.
Step 4: Pack the heavy gear in the middle
Place your food bag, cook kit, water reservoir and other dense items in the center of the pack, tight against your back. If your tent is heavy, put it here too, or divide the parts between your pack and a partner’s. Keep the weight centered left to right, so the pack does not lean to one side. For rough or steep terrain, move the weight slightly lower to improve balance, and for smooth trails you can move it slightly higher to stand more upright.
Step 5: Fill the gaps and the top
Use soft items such as clothing to fill the empty spaces around the heavy gear, so nothing shifts. Put your rain jacket, an insulating layer and a hat near the top for quick access. Keep your first aid kit, headlamp and navigation tools where you can reach them without unpacking. A tight, well-filled pack is more stable than one with loose gear rattling around.
Step 6: Use the outside pockets wisely
Side pockets are ideal for water bottles, a small tripod or trekking poles when not in use. The front stretch pocket is useful for a wet rain jacket, a tent fly or a dirty layer. Hip belt pockets hold snacks, lip balm, a phone and a small camera. The lid pocket holds the items you need often, such as sunscreen, a map and a headlamp. Keep valuable items inside the main compartment or close to your body.
Step 7: Protect your gear from rain
Even a water-resistant pack can leak at the seams. Line the main compartment with a trash compactor bag or use a pack liner, and place your sleeping bag and spare clothes in dry bags. Pack a rain cover for the outside, and keep it near the top so you can reach it quickly. Our guide to how to waterproof a hiking backpack explains the options in detail.
Step 8: Adjust and test the load
Once the pack is loaded, put it on and tighten the hip belt first so that it rests on top of your hip bones. Then tighten the shoulder straps, the load lifters and the sternum strap. Walk around, bend and climb stairs. If the pack sways, tighten the compression straps and move heavy items closer to your back. If you feel pressure on your shoulders, loosen the shoulder straps a little and tighten the hip belt. Our guide on how to put on a hiking backpack covers this in more depth.
How to pack for different trip lengths
For a day hike, you only need a small pack with water, food, layers and the essentials, and the three-zone rule is still helpful. For an overnight trip, the shelter and sleeping system take most of the space, so follow the order above. For multi-day trips, food is the heaviest item, so keep a day’s snacks at the top and the rest of the food in the middle. Our guide to packing a backpack for overnight hiking includes a sample list. For all trip lengths, pack what you need and not much more.
Where to put specific items
| Item | Best place | Why |
|---|---|---|
| Sleeping bag | Bottom | Light, bulky and needed at camp |
| Food bag | Middle, near the back | Heavy, keeps the weight centered |
| Stove and fuel | Middle or side, away from food | Keeps odors and leaks apart |
| Rain jacket | Top or front pocket | Quick access in a shower |
| First aid kit | Top or lid | Must be reachable fast |
| Water | Reservoir against the back or side pockets | Heavy, easy to refill |
Common packing mistakes
- Strapping gear outside. Items hanging from the pack swing and catch on branches.
- Putting heavy items low. It pulls your hips and strains your back.
- Packing at the last minute. You may forget something or pack in a hurry.
- Overpacking. Bring what you will use, and leave the rest.
- Ignoring balance. Uneven loads cause the pack to lean to one side.
Tips for packing efficiently
Use stuff sacks or packing cubes to organize small items, and label them so you can find things fast. Keep a consistent system, so that you always know where each item is. Pack your trip checklist, such as the one from REI Co-op, and tick items off as you go. After each trip, empty the pack, clean it and store it with the straps loosened. And if you fly with your pack, our guide on how to fly with a hiking backpack explains how to protect the straps.
Practice makes it easier
Packing gets faster with practice. Try a few trial loads at home, and walk around the block with them. Change the order if something digs into your back, and note what works. After a few trips, you will know the best arrangement for your pack and your gear, and you will be able to load it in minutes.
A sample packing list for a two-night trip
A reasonable load for a two-night summer trip includes a tent or tarp shelter, a sleeping bag and pad, a small stove with fuel, a pot and spork, two days of food plus a spare meal, a water filter and bottles, a rain jacket, an insulating layer, a spare base layer, socks, a hat, a headlamp, a first aid kit, navigation tools, sunscreen, a toiletry kit and a small repair kit. Put the sleeping bag at the bottom, the shelter and food in the middle against your back, and the rain jacket, snacks and first aid kit at the top. Hang or store food as required by local rules, away from where you sleep.
Packing for cold weather
Cold-weather trips bring bulkier gear, such as a warmer sleeping bag, a puffy jacket and extra layers. Use compression sacks to reduce volume, but avoid squeezing down insulation so tightly that it loses loft during storage. Keep a warm layer at the top of the pack so that you can put it on at every rest stop, and carry hot drinks in an insulated bottle. Put electronics and batteries in an inside pocket close to your body, as cold drains them quickly. Pack extra food, because your body burns more energy in the cold.
Packing for hot weather
In hot weather, you carry less clothing but more water. Put your water reservoir against your back so the weight is centered, and keep a bottle in a side pocket for quick refills. Use a pack with a ventilated back panel, and keep sunscreen, a hat and sunglasses within easy reach. Choose light, breathable layers, and pack a light long-sleeved shirt to protect your skin. Plan your water sources, and carry extra capacity for dry stretches.
Packing with a partner or a group
When you hike as a pair or a group, share the heavy items. One person can carry the tent, another the stove and cookware, and everyone carries their own food and clothing. Distribute the weight according to size and ability, and swap loads on different days if one pack is heavier. Share the group gear list so nothing is forgotten or duplicated. Agree on who carries the first aid kit and the navigation tools, and make sure that everyone knows where they are.
Final check before you leave
Do a last check at the trailhead. Confirm that you have the essentials, such as water, food, navigation, light, first aid, shelter and layers. Make sure the pack is adjusted, the zippers are closed and the straps are tucked in. Leave your itinerary with someone, and check the weather one more time. A few minutes of preparation at the start saves a lot of trouble on the trail.
FAQ
What goes at the bottom of a hiking backpack?
Light, bulky items such as a sleeping bag and camp clothes belong at the bottom.
Where should the heaviest items go?
Put them in the middle of the pack and close to your back, so the weight sits over your hips.
Should I pack my water inside or outside?
A reservoir against your back is best, while bottles fit well in side pockets for easy access.
How do I keep my gear dry?
Use a pack liner or dry bags, and add a rain cover for heavy rain.
How tight should I pack?
Fill the gaps with soft items and cinch the compression straps so nothing shifts.
Should I strap gear to the outside?
Only when needed. Items outside can swing and snag, so keep them minimal.
Related guides
- How to pack a backpack for overnight hiking
- How to put on a hiking backpack
- How to make hiking backpack lighter